Telesales agents have challenging jobs. Not only do they generate leads but also are responsible for guiding prospects through the sales funnel over the phone. Some may argue that sales don’t get any trickier than this, and we certainly understand their perspective. Apart from engaging in conversations with potential customers, outbound call centre employees need to navigate through telesales systems to update clients’ details and switch between various software to create orders for the clients committing to a purchase.
However, this is no longer the problem for the agents working with Leaddesk and using Waytobill’s payment plugin! Waytobill is now integrated with Leaddesk and so our payment solution is available from within the widely-used outbound call centre system.
What does it mean for you as a telesales agent?
By using the Waytobill plugin in your Leaddesk account, you get to save valuable time and simplify the sales process since the entire activity occurs directly in Leaddesk. Moreover, Waytobill's solution enables you to accept payments in real time during or immediately following the phone call. This directly impacts your conversion rate as, in a standard telesales approach, between 50 and 80% of customers drop off when it comes to completing the payment. By allowing customers to proceed with the payment while on the call, you could potentially save up to 50% of the potentially lost orders. Another great aspect of our plugin is that it allows you to sign customers up for recurring payments over the phone! This means higher retention and customer lifetime value!
In this blog post, we will take you through the order and payment creation process so that you can see how the Leaddesk integration comes in handy. Let’s take a look!
1. Creating orders in Leaddesk: start by accessing your account
Outbound call centres are sometimes hesitant to acquire new tools due to the training that agents must undergo in order to master the new software. Luckily, the Waytobill payment plugin can be accessed directly from Leaddesk, meaning that agents can start using it with no training required.
.webp?width=1260&height=641&name=leaddesk%20main%20screen%20(1).webp)
Once you’re on a call with a potential client, proceed with your standard script and lead the conversation towards your final goal, which in this case is to close a sale. When your prospect decides to buy a product, subscribe to a service or donate to a non-profit organisation, all you have to do is scroll down to where the Waytobill plugin is integrated.
2. Find the Waytobill payment plugin in your Leaddesk’s products
Use the “Products” tab to access information about the campaign you are working with. This system can be used for product sales, subscriptions and donations. If this is the case for your organisation, you can see different tiers with their names and prices. Are you using discounts or startup fees? No problem, you can add them at this step too.

So it’s time to create the order for your customers! For this specific example, let’s imagine that you’re selling fruit basket subscriptions. In this case, you have on offer 2kg, 8kg, and 10kg fruit baskets that can be delivered monthly, quarterly or yearly.
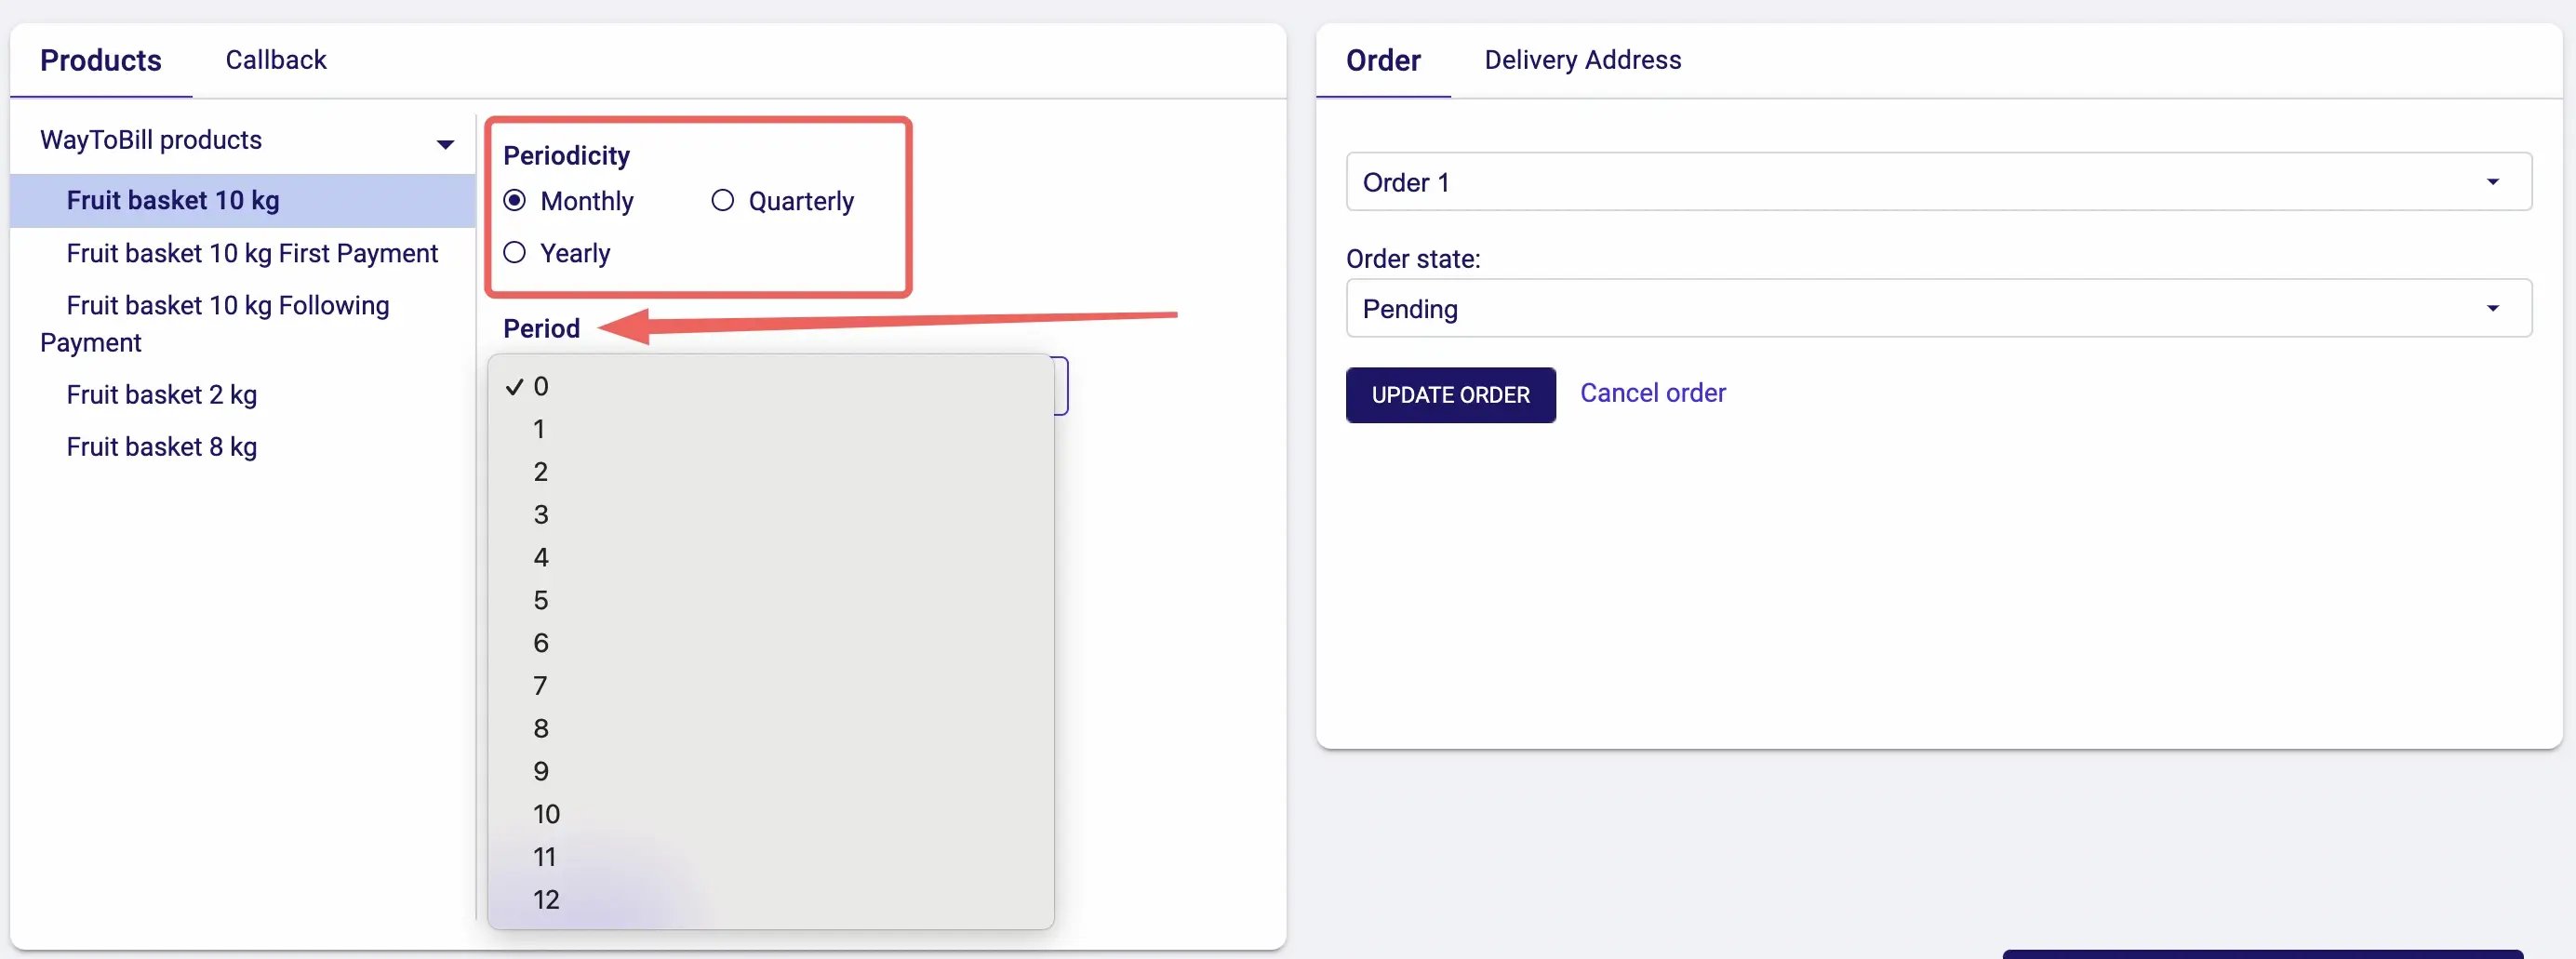
After choosing the type of subscription, it’s time to choose how many months the customer will be subscribed for. If you select 0, the order will have no end date, meaning it will be ongoing until further notice or cancellation from the customer.
Let the customer choose when they want the subscription to start. If you select a specific day of the month, all the following payments will be withdrawn on that same day. In our example, we will select “Subscription” in the order type. Once your order is ready, click on “Add to order”.
.webp?width=2768&height=1021&name=leaddesk%20sale%20type%20selector%20(1).webp)
3. One-time purchases and subscriptions in one place
You can use the Waytobill plugin to create not only subscription orders but one-time purchases too. To do so, you must follow the same steps as in the previous example, however, simply change the order type to “purchase” instead of “subscription” and set the period to 1. After adding this product to the order, you can also decide how many items should this customer pay for. On the right-hand side, you can see the 10kg fruit basket added to the order in the previous step. From the same section, you can remove a product or change the number of items you’re selling.
.webp?width=2774&height=1028&name=leaddesk%20integration%20with%20waytobill%20%20(1).webp)
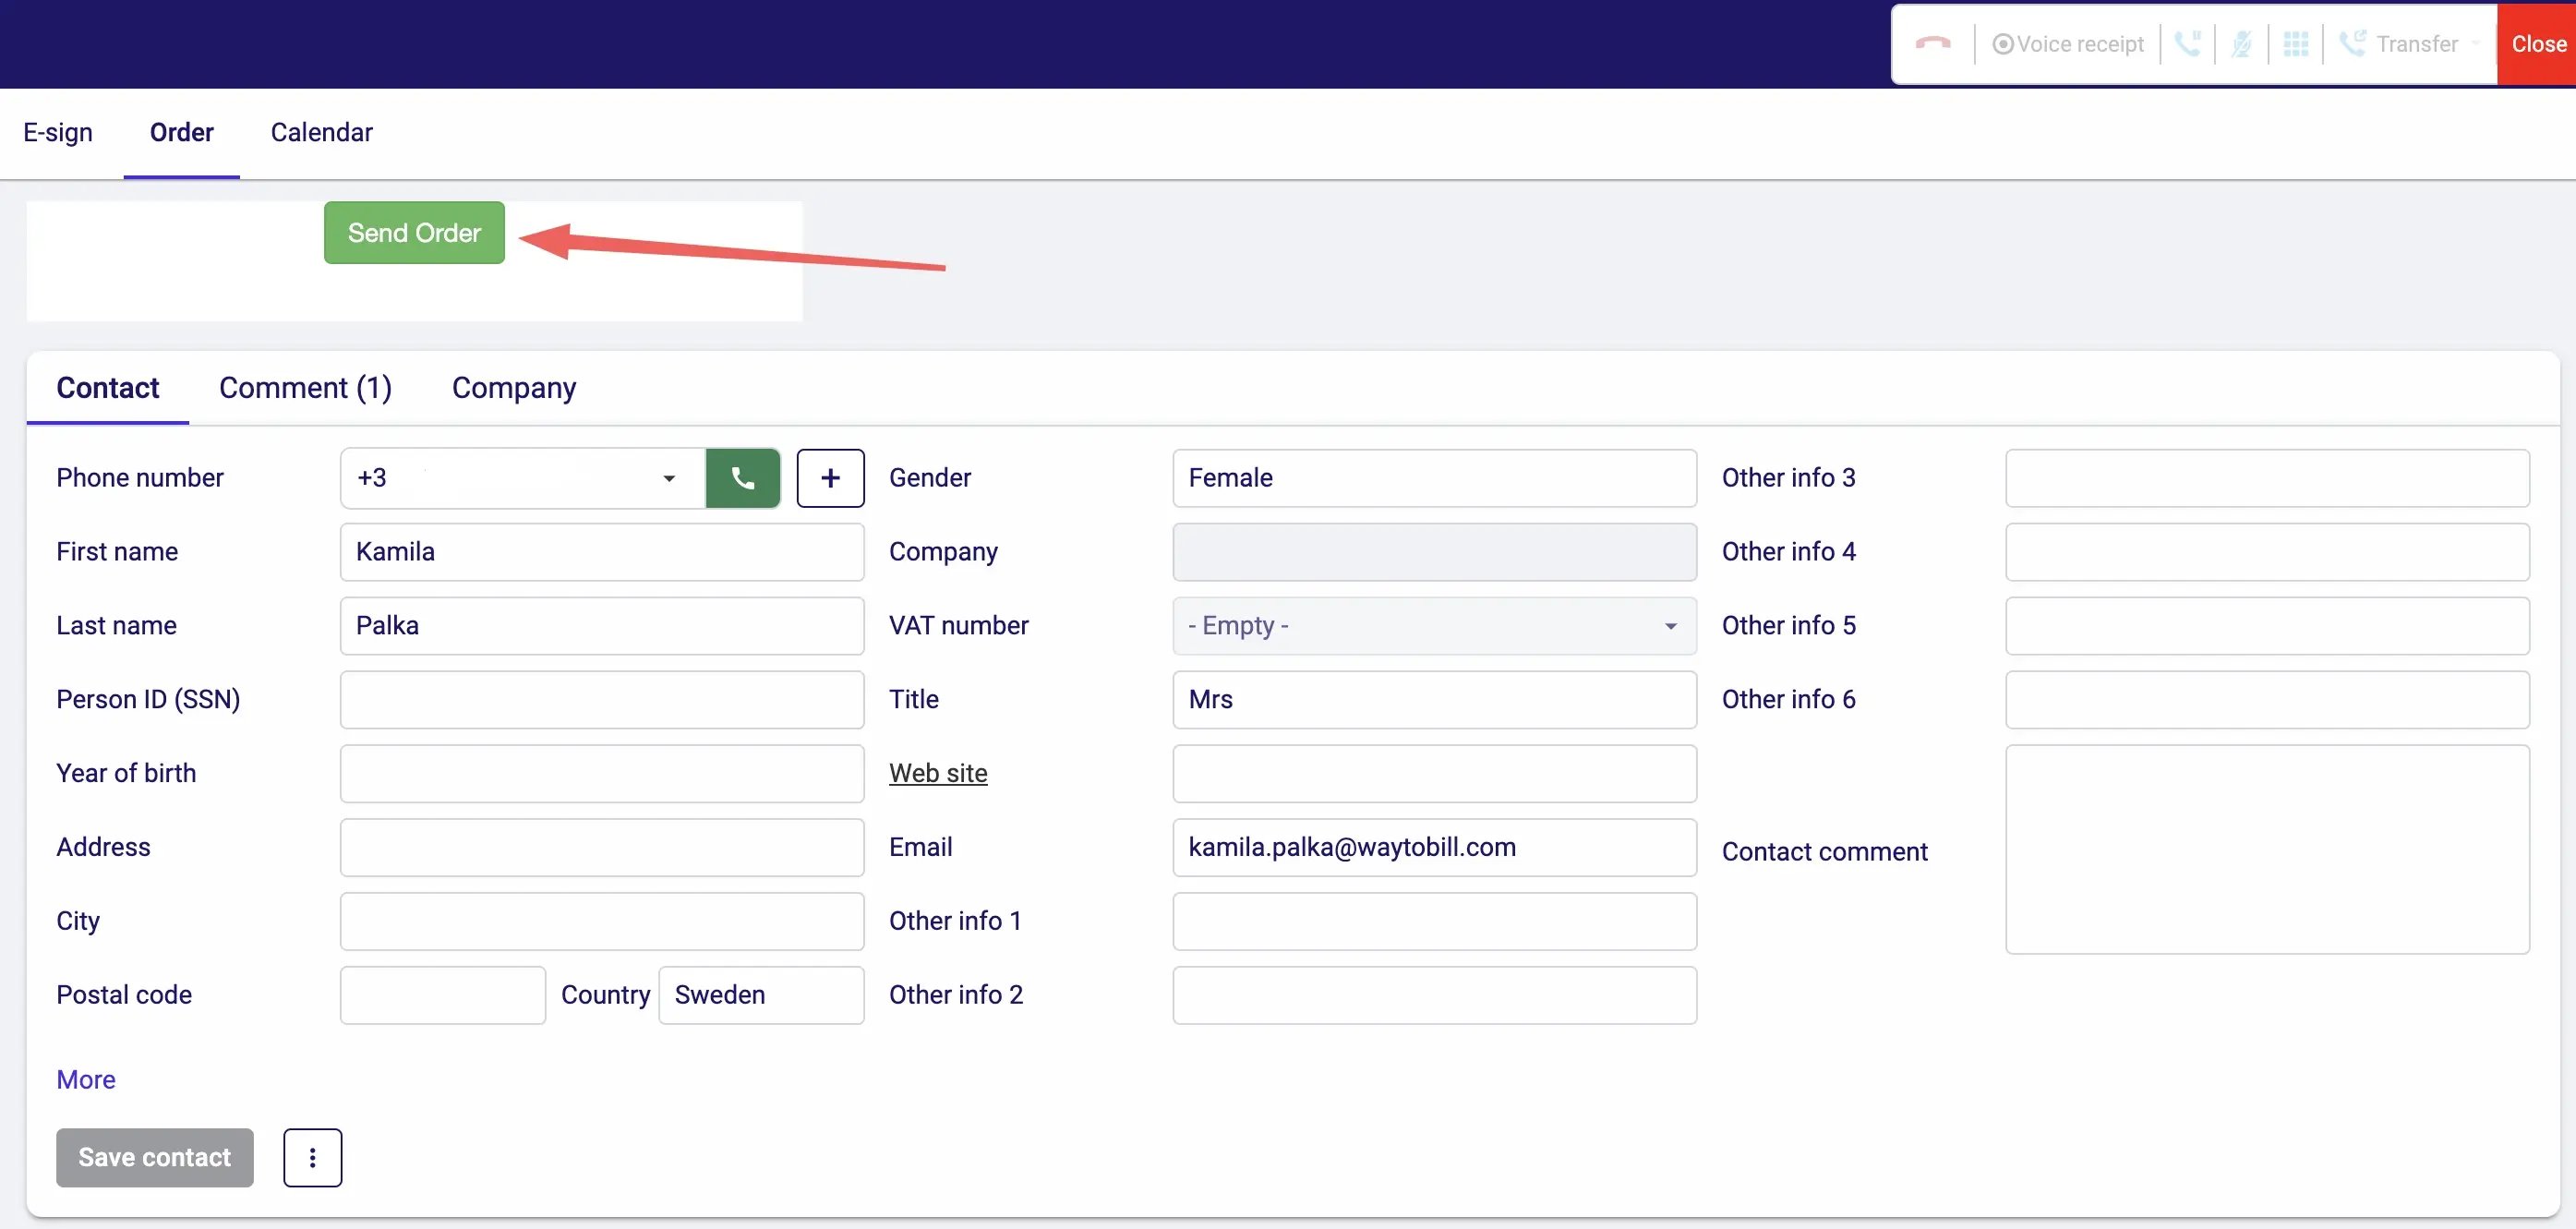
4. Send the order by text message and wait for the payment
Before sending the order to the customer, confirm all the details, for example, the subscription or donation start date. Once all is clear it’s time to hit the “Send Order” button!
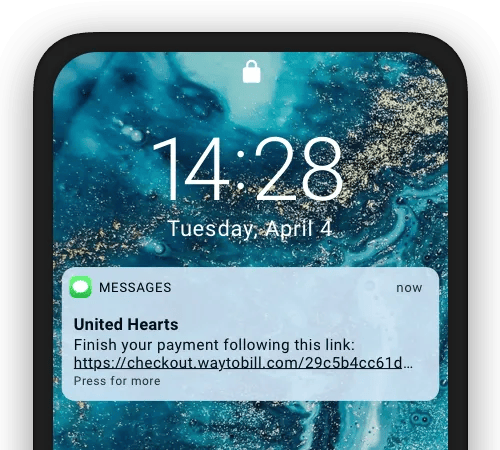
5. Customer receives a link via text message
Once you click on the “Send Order” button, your customer will receive a text message with a personalised payment link. By clicking on the link they will be redirected to an online checkout page pre-filled with their contact details and a summary of the purchase, along with the agreement and payment methods. At this step you can still stay on the line with the customer and guide them throw the checkout, providing answers to any questions that may arise.
In the mobile browser, the customer will be able to double-check the order or donation details, and in the next step, they will be asked to provide their email address to be able to receive the payment confirmation. In the first step, the customer will choose their preferred payment method — autogiro, card or invoice.
.webp?width=1600&height=1028&name=checkout%20waytobill%20(1).webp)
Be sure to check your country’s regulations to find out whether you can stay on line with the customer throughout the whole checkout. For example, in Sweden, agents must hang up after completing the confirmation step before the payment process starts. However, this is not a problem as you can receive the payment confirmation in real time!
%20(1).webp?width=2742&height=1116&name=Leaddesk%20-%20order%20status%20(1)%20(1).webp)
Having access to order statuses means that you can follow up with the clients that completed the checkout, as well as those whose payment is still pending. They might have gotten busy with something else or forgotten to complete the payment. Bear in mind, that the payment link is valid for 24 hours, so be sure to follow up with your customers on time.
Start using Waytobill from within Leaddesk
As you can see, Waytobill’s payment plugin is very straightforward and easy to use. Would you like to start collecting payments directly from your Leaddesk panel? Contact us to activate the plugin! And in the meantime, you can also find out more about our telesales integrations.
.webp)